Tuesday, October 13, 2015

Passing On Garden Center Savings

Nothing leaves a lasting impression like a first impression. So, what is someone’s first impression of your home?
Now that the weather is a little cooler it's the perfect time to spruce up your homes curb appeal. Thinking about planting, seeding, or any other landscaping this fall? Check out the deals at Broccolo Garden Center first. 
From seeds to trees and everything in between Broccolo Garden Center has all of the necessary goods and services to transform your yard into a beautiful oasis. If you are just getting started their knowledge and recommendations are second to none. Even an experienced gardener can pick up tips and get inspired by creative planting schemes.

Here are 4 more really good reasons to visit the garden center:
1. An amazing Barn Sale that includes 50% savings on planters, baskets, and loads of quality garden supplies. 
2. 25% off all shrubs and perennials. October is a perfect time to plant.
3. When you buy a tree, they'll plant it free!

Take the first step and visit Broccolo Garden Center today. Tell them your friends at Faber sent you. Faber Homes does not have any affiliation with Broccolo Garden Center. We just want to share the savings with you!

Friday, August 28, 2015

Decal Details


We’re always looking for ways to bring unique interior design techniques into our homes. One of the most recent finds we’ve stumbled on via HGTV, is the use of decals. Here are a few application techniques we love.

Photo Cred: HGTV 
 
Cabinet Door Decoration
Remove the cabinet doors. If the glass panes are removable, take them out and lay them flat. Arrange the decals—these come in strips—on the front of the glass in a pattern you like, taping them down with painter’s tape. Apply the decals following the instructions on the packaging, removing the tape as you go. Cut away any excess around the glass edges with a crafts knife.

Fun Lampshades
Not all decals stick to fabric, so use a paper shade. Cut out the stars—these come on a sheet—and arrange them in a pattern, taping them down with masking tape. Apply each star following the instructions on the packaging, removing the tape as you go. Fold any excess over the top and bottom edges.

Storage, Cleaning and Decoration
Grab those dustpans, storage bins and plain vases. Find decals that coordinate with the spaces those items reside and stick them on! You’ll be surprised how such an inexpensive detail can liven up your living space.

Mirror Mirror on the Wall
Trim the decals—these come in strips—to fit the mirror’s four sides, and position them along the edges. For the corners, cut each strip at a 45-degree angle and line them up so the patterns fit together. Apply the decals following the instructions on the packaging.

Find decals on websites such as wallpops.com, Etsy, or empirecitygraphics.com, and inexpensive furniture at Akia, wayfair.com, overstock.com, or refurbish old furniture you’re not using anymore. Good luck, and share your final products with us on our Facebook page!

Using Essential Oils in Your Home


If you’re at all present on social media, you’ve likely come across at least one post about essential oils. Popular companies like DoTerra and Young Living provide therapeutic grade oils, which can be used in hundreds of ways. But of course, we’re most interested in the ways in which the oils can be used in your home. Here are some of our favorite uses, via Young Living and DoTerra:

Create an aromatic space for your loved ones while cleaning. Put 5 drops of your favorite essential oil on a cotton ball and place it in a vacuum cleaner bag. Try Peppermint, Spearmint, Cassia, or Pine. Geranium can help with doggy odor.

Soak a dishcloth overnight in a bowl of water and add a few drops of Lemon to disinfect and kill germs. It is especially important after traveling or a cold to disinfect your space. Thyme and Eucalyptus are natural sanitizers.
 Photo Cred: naturalwellspring.com

Create an all-natural kitchen sink scrub by mixing ½ cup baking soda, ⅛ cup vinegar and 5 drops each of Bergamot and Lime. Put the mixture in the sink and scrub. Complete the process by washing the sink down with warm water.

Smelling something a little stinky? Place 1-3 drops of Four Thieves, Purification or Hope on a cotton ball and place on bottom of trash can or diaper pail. It cuts back on odors and kills germs.

To clean and increase shelf life of fresh fruit, fill a bowl with cool water and 2-6 drops of Lemon. Drop washed fruit into the water and stir. Your fruit will be luscious for days longer than usual.

For sticky messes, use 1-2 drops Lemon to remove gum, oil, glue, adhesive or crayon from most surfaces.

Clean the carpet with an all-natural carpet deodorizer. Add 5-10 drops of Lemon, Lavender, Geranium, Peppermint or Ylang Ylang to a box of baking soda. Mix well and sprinkle over carpets. Let the mixture sit for an hour or more and then vacuum.

To dispel of household cooking odors add a few drops of Clove, Cinnamon, or any citrus essential oil to a simmering pan of purified water.

When washing out the fridge, freezer or oven, add Lime, Grapefruit, Bergamot or Lemongrass to the final rinse water for a refreshing aroma.

To help keep squirrels, spiders or mice away place 3-6 drops of Peppermint on a cotton ball at the place they enter. Get rid of those pesky bugs without harmful chemicals.
To help keep flies away mix 25 drops of Peppermint or Lavender with 16 oz. purified water in large spray bottle. The mix can be used on counter tops, windows and doors. Be sure to shake well before each use.

Backyard Farms


You’ve probably started to notice the price of eggs has risen substantially. This is due to the Avian flu, and the worst outbreak of it in nearly 30 years. According to recent reports, about 50 million chickens and turkeys have died or have been humanely euthanized in 15 states as the virus has continued to spread.

Because of this outbreak, many families have begun turning to local farmers markets for their egg needs. If eggs are a main source of your family’s daily diet, you might consider purchasing from these local farmers, or even investing in your own chicken coop!

Photo Cred: backyardchickens.com 
 
Yes, your own chicken coop – we’re serious! Backyard farms have been growing in popularity, as many families now see the benefits of eating organic, non-GMO foods. Backyard chicken coops are becoming more popular, and they are allowed in most areas of Rochester. Check with your town on regulations and restrictions.

A little about backyard chickens:
·      They’re easy and inexpensive to maintain (compared to most in-home pets)
·      They manufacture the world’s best fertilizer
·      Fresh, delicious and nutritious eggs provided six days per week (hens take one rest day - can you blame them?)
·      Fun and friendly pets with a personality (truth!)

What you’ll need for the coop:
·      2-3 square feet per chicken and 4-5 square feet of running space per chicken outside the coop
·      Pine shavings and corn cob bedding
·      90-100 degrees for chicks, decreasing by 5 degrees each week after
·      Food, water, and treats like veggies, bread, and bugs
·      Playtime

Want to learn a little more? Check out backyardchickens.com!

Back to School

Ready or not – back to school season is upon us! In addition to those early morning alarms, your house will also soon welcome the paper piles, lunch prep and gym bags. It’s hard to keep up with it all, even if you’re blessed with a helpful child or teen (luck you!), and before you know it the holidays will be here. Yikes!

So how can you get the family organized? Here are some tips.

Create a homework or “launch pad” hub.
Let’s be honest. School time is messy time. It’s difficult to keep it all under wraps (and not give your children an excuse to not have their homework turned in!). Create a central location in your home where the family master calendar hangs, cubbies for lunch or milk money live, and workspaces for each child. This will help cut back on clutter and inevitable “Mom, I can’t find my…” battles in the morning.

Ease the family into the new schedule.
Don’t try to change bedtime routines in one night. It likely won’t work and will likely irritate your kids. During the last two weeks of summer, close in on earlier bedtimes 15 minutes at a time, and conduct pleasant wake-ups 15 minutes earlier each day. One of the most difficult things about doing this is that it often conflicts with meal times. It’s vital that children get an adequate dinner and breakfast, so move those meals around, and have snacks available during the day to help with the transition.

Gather your papers and plan those shopping trips.
Every child needs the basics: folders, tissues, pencils. But for the random needs, create a list and collect coupons. Stores like Target will have savings on certain items and you can double up by using store deals with manufacturer coupons. Asses which child needs what items of clothing and develop a wardrobe list (and be sure to discuss this list with said child to avoid in-store tantrums and morning disagreements). Get it all done in one day and then you won’t have to worry about it.

Also – speaking of paperwork, don’t forget about immunization records and proof of medical exams for your student athletes. Get those physicals done ahead of time and be ready for when the paperwork is needed.

Do a practice run.
The first day of school is not the time to find out how long it takes to walk to the bus stop, make lunches, and get everyone ready for the day. If your kids walk to school, help them find a safe route. If car-pooling, perhaps take a test drive during busy hours to ensure everyone gets to school on tie. And make sure your bus riders know their bus number and a few friends to follow to ensure the right kids make it to the right school. 

Thursday, July 23, 2015

You Can’t Kill It: Flowers


We discussed perennials a couple weeks ago, but this week we’re focusing on annuals – for those of us who like to mix it up year after year.

Zinnia
You can find Zinnias in nearly any color (except blue), and in a variety of heights. They work well in pots, planters, or in the ground, and can be planted in direct sunlight.

Marigolds
They’re super tough to kill, and they’ll brighten up any garden, planter or pot all summer long – because they just keep blooming. Some varieties of marigolds will grow as tall as 5 feet, but most variations are more compact.

Begonias
These tough cookies are often found in hanging baskets or in garden beds. Begonias will grow in sun or shade, and with just a little water, they will continue to grow and bloom through summer.

Snapdragons
A childhood favorite for many, snapdragons will bring butterflies to your garden at little labor-cost to you. In healthy environments, Snapdragons will grow tall and lush, making them strong and able to stand up to harsh weather conditions in the spring and fall.

Photo Cred: enkivillage.com 

Cosmos
Don’t have the best soil in your garden? Never fear. Cosmos are here! Cosmos flowers grow from seeds and can tolerate drought once they are up and growing (so all you have to do is water them to that point).

So now you have a list of annuals, perennials, shrubs and trees that you cannot kill. Which ones will you plant this year?

You Can’t Kill It: Trees


You need them for shade and even perhaps privacy. They add a certain aesthetic to your home, and a little bit of personality… but you just haven’t been able to keep one alive long enough to enjoy these benefits. We’re talking about trees of course. So which ones can you plant that won’t require a ton of TLC? Here are a few to start with.

American Hornbeam
This low-maintenance tree thrives in the shade of other trees, so if your yard backs up to other trees or greenery, it’s a fabulous choice to lend some shade to your yard. The American Hornbeam has thin bark with a muscled appearance and maintains a beautiful look in the winter months. In the fall, leaf colors will turn to beautiful shads of yellow, red and orange. It will grow to about 20 feet tall by 40 feet wide.

Bur Oak
A classic tree in the Northeast, the Bur Oak requires little maintenance. Acorns grow from this tall tree (80 feet!) and can be as large as 2 inches long. Perfect for large yards, if growing out in the open where roots can spread, the Bur Oak can grow as wide as it is tall.

Hackberry
A relative of the elm tree, the Hackberry takes similar form. They don’t require much attention, and soon grow and spread, providing excellent shade in your yard. They do also yield berry-like fruit in the late summer months, which welcome birds of many kinds. This tree will grow between 40 and 60 feet high by 40 to 50 feet wide.

Snowdance Japanese Tree Lilac
Growing as tall as 18 feet and 20 feet wide, the Snowdance Japanese Lilac Tree boasts a massive canopy that grows wider than it does in height. You’ll notice a lovely fragrance in the early summer months, which then fades, while still providing shade through lush green leaves. 

Photo Cred: pixgood.com

Northern Catalpa
If you’re looking for a taller tree that blooms, the Northern Catalpa is the tree for you. It’s flowering blooms show in the early summer months, which then turn into cigar-like pods. It is because of these pods that the tree has inherited the name “cigar tree.” The tree grows well in urban settings, and can grow as tall as 60 feet (and 40 feet wide). Just don’t plant it near water features or pools in your yard, as the pods do shed a bit.

You Can’t Kill It: Perennials


We left off last week with a list of our favorite shrubs that even if you tried very hard, you’d have a difficult time killing. To compliment your favorite shrub choice, we’ve compiled a list of some beautiful perennials that you will have a hard time destroying.

Ostrich Fern
Named after its appearance, which highly resembles the feathery tail of an ostrich, the Ostrich Fern spreads aggressively, making it perfect for spaces in need of ground cover.

Hosta
Perfect in dry soil, the hosta is a classic perennial that will turn any garden from drab into fab. Every year you’ll be rewarded with a fuller, more lush plant that yields white flowers in the peak of summer. For a little dimension, we recommend selecting the “Gold Standard” Hosta variety, as it boasts light green leaves with darker green edges.

Perry’s Blue Siberian Iris
A stunning purple flower that lasts as long as four weeks is what you can expect from this perennial. Perfect in full sun or part shade, the Perry’s Blue Siberian Iris will grow and bloom in just about any soil type. Dry soil? You’ll just have a shorter stem. Often paired with the Shasta Daisy, this flower is very hard to kill.

Shasta Daisy
She’s a classic, this beauty. The Shasta Daisy lives well in nearly any condition in any garden or yard. They require minimal water and only need your attention when blooms die off. Clipping spent blooms will extend the life of the daisy for months.

Photo Cred: ufseeds.com

Lily of the Valley
It’s true. This beautiful perennial can live a long, prosperous life in your garden. Ideal in mostly-shaded areas, Lily of the Valley perennials will bloom and make for lovely flowers in a vase.

If you’re in need of some shade for Lily of the Valley, stay tuned for next week’s blog on trees that you cannot kill.  

You Can’t Kill It: Shrubs


Roses from your significant other. Potted plants from your mother. It doesn’t matter. You kill everything with your not-so-green-thumb. It’s OK, you’re not alone. That’s why this month, we’re featuring a series of blogs on plants you cannot kill (or at least you’ll have a hard time killing them).

Don’t be “that house” on the street. Grab your gardening gloves and toss-around shoes. This week we’re featuring our favorite shrubs that you cannot kill.

Japanese Flowering Quince
Otherwise known as the “Pink Lady,” this flowering shrub gives your landscaping a blast of color, even into late winter. If you’re in need of a hedge and love colors like pink, coral, bright orange or even white, this shrub is perfect for your space. The flowering quince works well in wildlife gardens, so if your property backs up to trees, the dense interiors will provide great shelter for birds.

Black Beauty Elderberry
If high-contrast is what you’re hoping to achieve with your landscaping, the Black Beauty Elderberry might be the shrub for you. Its beautiful dark leaves are complimented with pink blooms which appear mid summer, followed by berries. You won’t want to eat the berries, however if you love birds, you’ll notice they’re drawn to these berries.

Rose Satin
More popularly known as a hibiscus, the Rose Satin brings beautiful, bold color through huge blooms in colors such as white, red, lavender and pink. If birds aren’t your cup of tea, but you prefer the likes of butterflies and hummingbirds, you’ll find they are attracted to the Rose Satin.

Photo Cred: gardengatenursery.com

Bridal Wreath Spirea
This mid-spring blooming shrub forms a beautiful fountain of white flowers, which linger on for about a week. It’s an extremely low-maintenance shrub, but it just needs room to spread, so the branches can do what they do best: cascade (and take up a ton of room in your yard so you don’t have to worry about planting a huge variety of other plants).

Bridal Wreath Spirea is best combined with perennials, so if you like this shrub the most, stay tuned to our blog next week on perennials that you cannot kill.

Friday, May 15, 2015

Fannie Mae to help out first-time homebuyers!


More good news has surfaced for first-time homebuyers, even as interest rates begin to slowly climb. Still on the fence about buying a new home? We think this might help: Fannie Mae is now offering to pay closing costs up to 3% of a home’s value, for first-time homebuyers.

That’s right, there really isn’t a catch! All you must do, is participate in the mortgage entity’s counseling course. For first-time homebuyers and families who do not have adequate savings, but qualify for a mortgage based on credit history and ability to pay, this new option will be extremely helpful.

So let’s do the math. If the home you’re waiting to build is $150,000, and Fannie Mae will pay up to 3% of that home’s value, you will see a closing cost deduction of $4,500. Here’s a little more information regarding the first-time homebuyer program.

Spring is the perfect time to build your brand new, customized, dream home. And now, thanks to Fannie Mae, the upfront costs associated with purchasing a new home are now much, much less.

Are you ready to move into a brand new Faber Home? Visit our website today or give us a call: 585.889.4840.

5 ways to boost curb appeal


You’re ready to make the leap and start designing your dream home. The checks are signed, deposit is made, floor plan is chosen, but there’s just one thing standing in your way: your current abode. It needs some work, no doubt, but what are the most important things to update to get that instant curb appeal, setting it apart from other properties in your area?

Photo Cred: pinterest.com
Here are five of our favorite easy updates that won’t break the bank.

Tidy Up! Many families opt for using the garage door as the home’s main entrance, but delivery drivers, pizza guys, and solicitors still access your front door. You’d be surprised how quickly little pieces of paper, delivery post-its, phone books and flyers pile up. Take a day and make sure the porch is clean and tidy. This will give guests a clear, clean view of your home.

Scrub-a-dub! Grab a broom, rent a power washer, and stock up on Windex. Start by giving siding a good power wash, removing dirt and grime and animal/bug debris. The power washer is also helpful for removing weeds from driveway cracks, so keep it handy if need be. Once the house has dried off, use a push broom to remove debris from your front porch, patio, walkways and driveway. After you’re done, clear off those windows, as this will let more unfiltered, natural light into your home.

Paint. You don’t have the paint the whole house (unless you want to), but a new coat of paint on your front door will do wonders for the overall appearance. Opt for a similar color to what you have, or spice things up with a dark blue or brick red for extra pizazz.

Grab some mulch. It’s amazing how a coating of mulch can completely transform the outside of your home. Just add a 2” layer around all flowerbeds, mailboxes, and trees about two weeks before your first showing. Mulch also helps trap in moisture, so you’ll be doing what bushes and flowers you have planted a favor, giving them a much-needed boost. If you have a lot to cover, consider purchasing mulch in bulk as this will be cheaper in the long run.

Plant TLC. Overgrown yards are not attractive, we all know that, but trees and shrubs can really add to the overall appeal of your home if they’re cut properly. Make sure branches aren’t touching the home (as this can actually cause siding damage and a gateway for critters to enter your home), and bush height should never overshadow a window, hindering natural light indoors.

Building a walkway


Faber Homes recommends waiting a couple years after moving into your brand new home before building patios or walkways in order to accommodate for settling. Once that time has passed, stones and other poured materials have a better chance of staying where you put them. So you’re ready to get started? Here is an easy how-to guide on assembling your new stone path.

First, lay out your path using string and stakes, and begin by digging the soil deep enough for the base, leveling as you go. Measure the space you’ve created so you’re accurately able to order gravel, sand and other supplies. Once you’ve cleared the space, shovel gravel in and compact it using a plate tamper after raking the space smooth. If you don’t have a tamper, you can rent one for between $25 and $50 per day. 
Photo Cred: houzz.com

Next, take the sand you ordered and cover the gravel with a 1 to 2 inch layer. Use a rake to smooth the surface and finish this step by running a string between two stakes to show where the finished path space will be.

Now is the fun part. Grab your stones and fit them close together along the path with quarter-inch gaps between each piece. Once your stones are placed where you want them, use a rubber mallet to set each stone in the sand. Finish by using a level to ensure all stones are level with each other and the string.

Using sand or rock dust, fill the gaps between the stones and set it by spraying the whole walkway with water. If the stones are still elevated, add another layer of sand (and spray with water) until everything is level. You can opt to add a sealant to ensure sand doesn’t make its way off the path and into your yard or home. This will also help to prevent bricks, stones or pavers from spreading and moving around where you don’t want them.

Send us your final project pictures on Facebook and we’ll feature them on our page! Good luck!

Top 10 landscaping mistakes


It’s that time of year to get outside and landscape. You have an idea of what looks nice, but we all have that neighbor who went overboard. Don’t be that neighbor and take note of some of these landscaping mistakes. 

1.     Excessive lawn ornamentation. Need we say more? Stick to a theme and make sure those ornaments fit the rest of your landscaping design. If you must, sick to one statement, as opposed to ten (or more).

Photo Cred: privateandpublicspace.wordpress.com

2.     Planting in the wrong locations. Many people don’t heed the warnings and read the directions on the plant tags. They’re there for a reason! Make sure you’re planting new items in the right places. HGTV’s Plant Finder is a great tool to double check seasonality, light exposure and hydration needs.
3.     Short grass. It’s a myth that cutting grass shorter will yield less time out mowing throughout the season. It’s actually the opposite, and you can end up doing more harm to your lawn. Exposing too much earth can cause bare patches and dryness, and it also opens the door for insects to make homes.
4.     Incorrect potting. Large planters are all the rage, but it’s easy to incorrectly plant items when you feel like you have a lot of space. Make sure you’re not planting a plant in a pot that’s too large, as it can sink down causing it to get too much water (or the opposite – dry out too fast).
5.     Blotchy lawns. Caused by improper or non-existent fertilization, a spotty lawn can really be an eye sore. Visit a Home Depot, Lowes, or local garden center and ask for a professional’s help with fertilization. Let them know how much (and why type) of sun your lawn gets and what types of fertilizer will work best. Fertilizing should be done at least twice per year, never in the bright sun, and with a good long soaking.
6.     Not taking animals into account. New York is a beautiful place to live, there’s no doubt! But in living in such a lush, green area, we also have our fair share of critters that frequent our properties. From deer to birds to rabbits, each are in search of tasty treats that are easily accessible, so make sure you’re not planting items that they love, otherwise you’ll end up with chewed up green stalks and no color.
7.     Overgrowth. Again citing our trusty HGTV tool, Plant Finder, make sure the plants you choose are the right plants for the areas they’re being planted in. Keep in mind, some plants grow very quickly and can span large areas. While the color may be what you’re looking for, the size may really hinder the overall appearance of your home.
8.     Too. Many. Colors. Pick a color theme and stick to it. Coherence in your color palette will create harmony and beauty, while a cluster of colors will be just that – a cluster. 
9.     Not family-friendly. Some people get carried away with ornamentation themes in their yard for visual appeal, but forget about usability. After all, you’re paying taxes for the land your house is on so you ought to be able to use some of it, right? It’s best to start off with a list of what you want to be able to do in your yard and go from there, design-wise.
10. Sticker shock. It’s easier to start a project than it is to finish it. But sometimes, without proper project estimation, we can get carried away with the cost of finishing the job, leaving it partially or totally uncompleted. Get a budget and estimate together before you get started, so your project gets completed and looks nice sooner rather than later!

Tuesday, April 14, 2015

Growing berries in NY


Did you know it’s totally possible to grow delicious berries in your backyard in New York? Many gardeners stick to the veggie staples like pumpkins, carrots, and peppers, but our temperatures are absolutely conducive to growing berries. You’ll want to get started on your garden soon, so here are some tips on growing these yummy fruit.


 Photo Cred: livinghealthyway.com
Start with a healthy soil base. Deep, fertile soil containing high organic matter really helps to set the foundation for a healthy, prosperous garden. The garden site should also have excellent drainage year-round, and be prepared to address early spring frosts.

Weed control is a vital component to growing berries, especially strawberries. You’ll want to get a jump start on the season and plant your berry garden before mid-May, and start immediately with residual herbicides to address upcoming weed sprouts.

Otherwise, berries should be planted 12-18 inches apart on raised beds with around 40 inches between each row. Water daily to ensure adequate hydration, and with proper care, berries will yield about 6 to 7 pickings beginning about a month after the first bloom.

If you desire late-season pickings in the late fall, it’s important to take care of the garden area for cooler temperatures. Mow off leaves close to the ground so the deceased leaves can be replaced, improve access to sunlight, fertilize, place new soil over the plant crown to improve root growth, and apply a dose of herbicides to take care of weeds. Once it does start to get cool, it is recommended that you toss a layer of mulch to minimize frost damage. Just be sure to remove the mulch in the spring of the following year.

Will you spruce up your garden with some delicious berries this year? Let us know in the comments below!

Upcycling furniture


Stop! Don’t throw that old furniture away! We’re about to list off some great tips on how to rehab that old dresser and make it new and functional again – no need to go buy something new when you can recreate something totally unique and beautiful.


You’ve seen them on shows like American Pickers – old giant convenience store signs make for interesting headboards. Just make sure they get a good cleaning first.

Take a drab dresser and turn it into a stylish piece of art. Here are some tips on how to incorporate chevron stripes and add a pop of color to your bedroom. Not a fan of chevron? Here are some tips on how to paint flowers on your dresser using wood ice cream sticks.

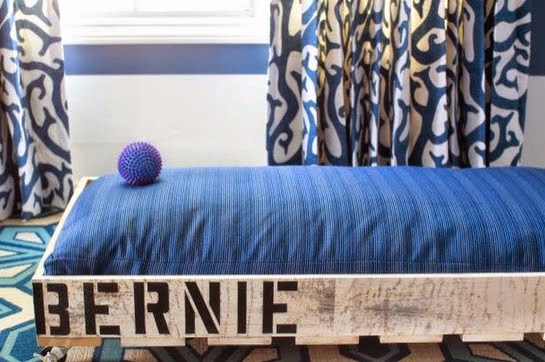
Turn old wood shipping palates into functional dog beds that won’t (completely) tear to shreds.

Photo Cred: HGTV
Find wrapping paper patterns that work for your space and decoupage them on your desk or dresser.

Vintage dressers might seem outdated, but have you ever thought about using one as a bathroom vanity?

Give those drawers a makeover. Paint that old dresser and grab some house numbers and use them as the handles.

Drawers too far beyond repair? Just tear them out and try a new side table design like this one.

Barn wood door turned into headboards can be exquisite. Here’s an example that isn’t too difficult.

Here’s one of our favorites. Grab that big old dresser, give it a paintjob and behold: everyone in the family now has somewhere to store their own shoes, hats and gloves in the mudroom.

Do you have some furniture rehab favorites? Share them in the comments below. Find these ideas and even more on our Pinterest board!

Low maintenance plants


Even if there’s still snow on the ground, it’s still technically spring, so we are getting in the gardening mood here at Faber Homes! Whether you’re a new family with us, current resident, or thinking about building a new Faber Home, landscaping is probably on your checklist. Curb appeal is not only nice for passerbys, but everyone wants an attractive home on the (inside and) outside. You certainly don’t want to be “that house” with the overgrown, weed-infested lawn.

Don’t have time for a full blown landscaping job this year? No worries. Here are some plants to start you out that are low maintenance and beautiful.  


Photo Cred: homecurbappeal.com

Trees
Velvet Cloak Smoke Tree. Best planted in full sun in the spring or early fall, this small tree has deep purple leaves and can grow to 10-15 feet tall and 15-20 feet wide.

Winter King Hawthorn. If you’re looking to add some shade to your yard, this small flowering tree is perfect. This deciduous tree can grow to a height of 15-20 feet and span a width of 18-20 feet, and its beautiful white cluster flowers bloom in May and then give way to red fruits in the late fall.

Shrubbery
Japanese Barberry. If you’re looking for a quick-growing shrub, the Barberry is perfect. Be sure to watch the plant’s growth, as it can take an area over very quickly (and trim those spent flower stalks as it grows to prevent seedlings). Best planted in the spring in full sun, this plant can grow to 3-4 feet tall by 3-4 feet wide, making it a very suitable solution for quick landscaping.

Elijah Blue. This evergreen ornamental grass has a blue-gray foliage and sprouts blue-green flowers if planted in the spring. Each gathering can grow 8-12 inches high and the same in width. These grasses are beautiful and can even be used to cover less than attractive yard requirements such as power boxes and other utilities.

Flowering Plants
Peony. Known for its large fragrant flowers, the peony should be planted in full sun to light afternoon shade. These plants can grow up to 30+ inches tall and can span 25-35 inches wide. They’re best planted in the spring, so grab some seeds soon!

Endless Summer Hydrangea. This flowering plan is as beautiful as it sounds. Endless Summer Hydrangea begins its season with lime green flowers which then change to pink during the summer. Each grouping will grow to 8-10 feet high and the same in width, so be sure you’re planting this beauty in an area that can accommodate such growth, as it will happen quickly.